1) 타자게임
2) 그림맞추기게임
3) jquery
3-1)정의
3-2) 불러오기
3-3)간단한사용 예
4) JS 예제
1)타자게임
<!DOCTYPE html>
<html lang="en">
<head>
    <meta charset="UTF-8">
    <meta name="viewport" content="width=device-width, initial-scale=1.0">
    <title>Document</title>
    <style type="text/css">
        div{position: absolute;}
        #main{width: 450px; height: 400px;
             border: 1px solid blue;  overflow: hidden;}
        input{
            position: absolute; top: 410px;
            left: 10px;     size: 200px;
        }
        #scoreArea{
            position: absolute; top: 410px;
            left: 210px;
            border: 1px solid #333333;
            width: 200px; height: 20px;
        }
        #score{
            display: inline; /* 크기 적용 */
            position: relative;

        }

    </style>
</head>
<body>
    <div id="main"></div>
    <div style="width: 400px;">
        <input type="text" onchange="deleteMode(this.value)" id="input">
        <div id="scoreArea">점수:
            <div id="score"></div>
        </div>
    </div>
    <script>
        let datas = [
            ["태연","유리","윤아","효연","수영","서현","티파니","써니","제시카"],
            ["원영","유진","이서","레이","리즈","가을"],
            ["카리나","윈터","닝닝","지젤"]
        ];
        let cnt=0;
        let words=[];
        let colors = ['red','blue','green','gray','orange','pink']
        let canvasWidth = 400;
        let canvasHeight= 400;
        window.onload = function(){
            cm = setInterval(createMode,2000); //2초마다 데이터추가
            mm = setInterval(moveMode,500); //0.5초마다 이동
        }
        function MovingChar(){
            this.h3 = document.createElement('h3');
            this.h3.innerHTML = randomDate();
            this.x = random(canvasWidth); //랜덤한너비
            this.y = 0;
            this.vY = 10; // 단어이동의 간격
            this.h3.style.position = 'absolute';
            this.h3.style.left = this.x +'px';
        this.h3.style.color = colors[random(6)]; //0~5번인덱스의 랜덤한 색깔
            document.querySelector("#main").appendChild(this.h3);
            //#main 하위에 h3를 넣는다
        }
        MovingChar.prototype.move = function(){
            if((this.x+this.h3.innerHTML.length)>canvasWidth){
                this.x=canvasWidth-(this.h3.innerHTML.length+1);
            }
            this.y += this.vY; //y축변화주기
            this.h3.style.top = this.y +'px'; //y축간격 적용
        };

        MovingChar.prototype.remove = function(){//remove함수 : 자식을 지운다
            //removeChild : 자식태그제거
            document.querySelector("#main").removeChild(this.h3);
        };

        function createMode(){
            words.push(new MovingChar());
        }
        function moveMode(){
            for(let i in words){//words배열의 크기만큼 루프
                words[i].move(); //y축변화
                if(words[i].y >= canvasHeight-30){ //바닥에닿은경우
                    document.querySelector("#main").removeChild(words[i].h3);
                    delete(words[i]);
                    clearInterval(cm); //숫자만들기종료
                    clearInterval(mm); // 이동종료
                    for(let j in words){
                        words[j].h3.style.color = 'grey';
                        //게임종료시 글자색 변경
                    }
                    alert("게임종료")
                }
            }
        }
        function random(num){
            let num1 = Math.random()*num;
            return  parseInt(num1);
        }

        function randomDate(){
            let num1 = parseInt(Math.random()*3); // 0~2
            let num2 = parseInt(Math.random()*datas[num1].length); //0~배열의마지막인덱스
            return datas[num1][num2];
        }
        //input데이터의 value값입력시  호출되는 함수
        function deleteMode(str){
            for(let i in words){
                words[i].move();
                if(words[i].h3.innerHTML === str){ //입력받은수와 words배열에 요소중 하나와 같다면
                    document.querySelector("#main").removeChild(words[i].h3); // 없애기
                    delete(words[i]);// 메모리에서도없앰
                    document.querySelector("#score").innerHTML = ++cnt; // count++;
                }
            }
            document.querySelector("#input").value="";
            document.querySelector("#input").focus();
        }
    </script>
</body>
</html>
2) 같은 그림 찾기
<!DOCTYPE html>
<html lang="en">
<head>
    <meta charset="UTF-8">
    <meta name="viewport" content="width=device-width, initial-scale=1.0">
    <title>Document</title>
    <style>
        table,td{border: 1px solid red;}
        table{border-collapse: collapse;}

</style>
</head>
<body>
    <!--onchange : value값이 변경된경우 발생되는 이벤트-->
    <select id="level" onchange="gamestart(this)">
        <option value="2">2 X 2</option>
        <option value="4" selected="selected">4X4</option>
        <!--selected="selected" : 기본선택자 -->
        <option value="6" >6X6</option>
    </select>
    <div id="board"></div>
</body>
</html>
<script type="text/javascript">
    let level=4;
    window.onload = function(){ //창이 열릴 때 실행
        shuffle(); //이미지섞기
        editHtml(); //이미지로테이블을만들어 출력
        game(); // 겜시작
    }

function gamestart(sel){
    level = parseInt(sel.value); //선택한 숫자의 테이블생성
    shuffle();
    editHtml();
    game();
}
</script>
Suffle function : 사진섞기
function shuffle(){ //사진섞기
        model = ["S_1.jpg","S_1.jpg","S_2.jpg","S_2.jpg",
                "S_3.jpg","S_3.jpg","S_4.jpg","S_4.jpg",
                "S_5.jpg","S_5.jpg","S_6.jpg","S_6.jpg",
                "S_7.jpg","S_7.jpg","S_8.jpg","S_9.jpg",
                "S_9.jpg","S_9.jpg","S_10.jpg","S_10.jpg",
                "pic00.png","pic00.png","pic01.png","pic01.png",
                "pic02.png","pic02.png","pic03.png","pic03.png",
                "pic04.png","pic04.png","pic05.png","pic05.png",
                "pic06.png","pic06.png","pic07.png","pic07.png"];
        cnt  = level * level;//사진의갯수
        for(let a=0 ; a<10000 ; a++){
            let ran = Math.floor(Math.random()*cnt);
            let tmp = model[0];
            model[0] = model[ran];
            model[ran] = tmp;
        }
    }
editHtml function : 사진을 테이블로만듬 각자 다른 id를 부여해 버그방지
(같은사진을 두번누르면 성공으로 인식하는오류)
 function editHtml(){ //a^2 개의 사진을 a X a테이블로만듬
        let board = "<table>";
            for(let i=0;i<cnt;i++){
                if((i%level)==0) {
                    board += "<tr>";
                }
                board+=`<td><img id='pic${i}' class='pic' src='./img/${model[i]}' value='${model[i]}'
                    width='100' height='100'></td>`;
                if((i%level)==(level - 1)) {
                    board+=`</tr>`;
                }
            }document.querySelector("#board").innerHTML = `${board}</table>`;
    }
game function : 게임함수
 function game(){
        setTimeout(function(){
            let pics = document.querySelectorAll(".pic");//class가 pic인 객체들
            //배열의 모든요소 순회
            pics.forEach(function(item){//item : img객체
                item.setAttribute("style","opacity:0");
                //opacity : 투명도(0~1사이의값)
            })
        },2000); //2초후에 실행
    let total = 0;//클릭수
    let count=0;//1번쨰,2번째클릭된 이미지지
    let success =0; //쌓인 이미지를 찾은 갯수수
    let onePic = null;
    let twoPic = null;
    let pics = document.querySelectorAll(".pic");
    for(let i=0 ; i<pics.length ; i++){
        pics[i].onclick=function(){ //이미지를 클릭한경우
            //이미지의 class=diepic이 아닌경우.   class=diepic : 이미 이미지를 찾은경우


            if(pics[i].getAttribute("class").indexOf("diepic") < 0 ){
                total++;
                pics[i].setAttribute("style","opacity:1");//이미지를 보여지게(불투명도1)
                count++;
                if(count==1){
                    onePic = pics[i];
                    oneId = onePic.getAttribute("id");
                }
                else if(count==2){
                    twoPic = pics[i];
                    twoId = twoPic.getAttribute("id"); //아이디는 유일함

                    if(onePic.getAttribute("src") == twoPic.getAttribute("src") && (twoId!=oneId)){ //같은이미지쌍
                        success++;
                        onePic.setAttribute("class","diepic");
                        twoPic.setAttribute("class","diepic"); //class를 diepic으로변경
                        onePic.disabled = true;
                        twoPic.disabled = true;
                        if(cnt/2 == success){ //cnt:사진의갯수(쌍)
                            alert(total+"번클릭 만에 성공 게임종료")
                            setTimeout(function(){
                                if(confirm("게임을 계속할거에요?"))
                                location.reload(); //새로고침
                            },2000); //2초후에  동작
                        }
                    }
                    else{
                        setTimeout(function(){
                            onePic.setAttribute("style","opacity:0.01");
                            twoPic.setAttribute("style","opacity:0.01");
                        },1); //0.05초
                    }
                    count=0; //2개의사진 선택완료 후
                }else{
                    //count변수의 값이 1 or 2가 아닌경우 오류
                    alert("프로그램오류")}
            }
        }//onclick종료
    }//for종료
}//game함수종료
3) jquery
3-1) 정의 , 사용이유 , 특징
정의
- JavaScript를 더 쉽고 간결하게 사용할 수 있도록 도와주는 라이브러리
사용 이유
- JavaScript로 웹 페이지를 동적으로 만들 때 DOM을 조작하는 코드가 너무 길고 복잡했음
- JavaScript로 특정 HTML 요소를 찾고 스타일을 변경하는 경우
document.getElementById("title").style.color = "red";jquery 사용
$("#title").css("color", "red");
특징
- 코드를 간결하게 작성할 수 있음
- HTML 요소를 쉽게 추가, 변경, 삭제할 수 있음
- 이벤트 처리가 간편함
- 애니메이션 효과를 쉽게 넣을 수 있음
- 다양한 플러그인을 사용할 수 있음
- AJAX(비동기식 통신), 이벤트 처리 등등 폭넓게 지원함
3-2) jquery 불러오기
- 웹 페이지에 jQuery를 사용하려면 jQuery 라이브러리를 HTML 파일 안으로 불러와야함
- 불러오는 방법은 CDN방식과 파일 다운로드 방식 2가지 있음
방법1) 다운로드방식
jQuery 코드 파일을 직접 다운로드해서 서버(컴퓨터)에
저장해서 사용하는 방법
-
- 인터넷이 없어도 jQuery를 실행할 수 있음
- resources 폴더에 jquery-x.x.x.js 파일 생성
- jQuery 웹 사이트로 이동
- <Download jQuery 버전> 버튼 클릭
- [Download the uncompressed~] a태그 클릭
- 코드 전체 복사
- 앞서 생성한 파일에 붙여넣고 저장하기
- HTML파일에 script 태그 추가하기
- 인터넷이 없어도 jQuery를 실행할 수 있음


다음과 같이 jquery다운로드에 들어가면 나오는 문장들을 전부
내가만든 jquery..3.7.1.js에 붙여넣기해줌

주의사항
- 일반적으로 버전은 항상 최신버전을 받으면 됨
- 그러나, 종종 버전간에 호환이 안되는 경우 있음
- 기존 프로그램에서 사용하는 버전이 있다면 맞춰서 다운받기
방법2) CDN방식
- Content Delivery Network의 약자
- 인터넷에 있는 jQuery 파일을 직접 가져오는 방식
- jQuery 공식 사이트에서 제공하는 링크를 HTML에 추가하면 됨
- 빠르고 간편하지만 인터넷이 끊기면 jQuery로 작성된 코드가 동작하지 않음
- jQuery 웹 사이트로 이동
- [Download] 메뉴 클릭
- 스크롤을 중간쯤 내려서 [jQuery CDN] 항목 찾아서 클릭
- jQuery 3.x버전에서 <uncompressed>를 클릭
- <script>태그 코드 복사
- HTML 페이지에 붙여넣기
- 이것


<script src="https://ajax.googleapis.com/ajax/libs/jquery/3.7.1/jquery.min.js"></script>
주의사항
- 일반적으로 버전은 항상 최신버전을 받으면 됨
- 그러나, 종종 버전간에 호환이 안되는 경우 있음
- 기존 프로그램에서 사용하는 버전이 있다면 맞춰서 다운받기
3-3) 간단한 사용 예시
window.onload
- html문서 내에 한번만 작성가능
[여러번작성시 마지막 함수만 실행]
- 문서내의 모든 요소들이 load완료 + 연동된 문서들까지 load완료된 경우
jQuery방식은 3가지 구문 제공
1) jQuery(document).ready(function(){..})
2) $(document).ready(function(){..})
3) $(function(){..})
- 여러번 기술된 경우 순서대로실행됨
- 해당문서의 요소들이 모두 load되면 바로실행행
 <script src="jquery_3.7.1.js"></script> <!--jQuery를 사용하겠다는 뜻
        (다운로드 방식을 이용해 미리 복사해서 가지고있었음)-->

    <!--    CDN
        <script src="https://ajax.googleapis.com/ajax/libs/jquery/3.7.1/jquery.min.js"></script>
    -->
    <script>

        window.onload = function(){
            console.log("window.onload 구문실행1")
        }
        window.onload = function(){ //이부분만실행됨
            console.log("window.onload 구문실행2")
        }
//jQuery 이용
        jQuery(document).ready(function(){
            console.log("document ready 구문실행1")
        })
        jQuery(document).ready(function(){
            console.log("document ready 구문실행2")
        })
        $(document).ready(function(){
            console.log("document ready 구문실행3")
        })
        $(function(){
            console.log("document ready 구문실행4")
            /*
            //자바스크립트방식으로 요소선택
            document.querySelector("#test").style.backgroundColor="red";
            document.querySelector("#test").onclick = function(){
                this.innerHTML = "클릭됨";
            }
            //h3태그들의 글자색을 파란색으로 변경
            const h3arr = document.querySelectorAll("h3");
            for(let i = 0; i<h3arr.length ; i++){
                h3arr[i].style.color = "blue";
            }*/

           //위에 script 구문을 jQuery로 구현
           $("#test").css("backgroundColor","red");
           $("h3").css("color","blue")
           $("#test").click(function(){
            $("#test").html("클릭됨");
           })
        })

    </script>
    <div id="test">안녕하세요</div>

</body>

4) JS 예제
예제1)

<!DOCTYPE html>
<html lang="en">
<head>
    <meta charset="UTF-8">
    <meta http-equiv="X-UA-Compatible" content="IE=edge">
    <meta name="viewport" content="width=device-width, initial-scale=1.0">
    <title>Document</title>
    <style>
        *{box-sizing: border-box;}
    </style>
</head>
<body>
    <h2>
        아래의 input[type=number] 두개는 숫자를, select>option 요소는 연산하고자 하는 연산자를 입력받기 위한 것이다. <br>
           실행 버튼 클릭시 사용자가 입력한 값들을 가지고 그에 맞는 적절한 연산 후 div#calc-result에 결과가 출력될 수 있도록 하시오.
    </h2>

    <div id="cal-container">
        <input type="number" id="su1">
        <input type="number" id="su2">
        <select name="op" id="op">
            <option value="+">+</option>
            <option value="-">-</option>
            <option value="*">*</option>
            <option value="/">/</option>
        </select>
        <button onclick="test();">실행</button>
        <div id="calc-result"></div>
    </div>

</body>
</html>
<script>
function test(){
let num = document.querySelectorAll("input");
console.log(num[0].value)
console.log(num[1].value)
let sel = document.querySelector("#op").value;//선택된 option 값
console.log(sel)
//eval(): 연산을 도와줌 등호를 인식함.
document.querySelector("#calc-result").innerHTML=eval(num[0].value+sel+num[1].value);
}
</script>예제2)
<!DOCTYPE html>
<html lang="en">
<head>
    <meta charset="UTF-8">
    <meta name="viewport" content="width=device-width, initial-scale=1.0">
    <title>Document</title>
</head>
<body>
    <h2>
        div.img-container 안에 원하는 이미지를 100x100사이즈로 한개 출력하고 <br>
        그 사진을 클릭할때마다 이미지의 크기가 가로 세로 10px씩 증가되게끔 구현하시오.
    </h2>
    <div class="img-container">
        <img src="../img/apple.gif" width="100" height="100" id="img">
    </div>
<script>
    document.querySelector("#img").onclick = function(){ //클릭시 발생하는 이벤트를 만들어줌
        this.width += 10; // 너비 10씩증가
        this.height +=10;//  높이 10씩 증가
    }

</script>
</body>
</html>
예제3)

<!DOCTYPE html>
<html lang="en">
<head>
    <meta charset="UTF-8">
    <meta name="viewport" content="width=device-width, initial-scale=1.0">
    <title>Document</title>
</head>
<body>
    <h2>
        추가 버튼 클릭시마다 input[type=text]인 요소가 div.input-container에 추가될수 있도록 구현하시오.
        단, 최대 10개까지만 추가될 수 있도록 하시오. (10개를 초과하려는 순간 "10개까지만 추가 가능합니다."와 같은 알람창 출력)
    </h2>
    <button onclick="test()">추가</button>
    <div class="input-container"></div>

</body>
<script>
    function test(){
        let container =  document.querySelector(".input-container");
        //하위요소인 input이 10개가 넘어가지않을때까지만! 추가해줌
        let Clength = document.querySelectorAll(".input-container>input").length;
        if(Clength<10){
            container.innerHTML += `<input type='text'>${Clength+1}<br>`
        }
        else{ //10개가넘었다면 추가불가능
            alert("10개까지만추가가 가능해요")
        }
    }
</script>
</html>
예제4)
<!DOCTYPE html>
<html lang="en">
<head>
<meta charset="UTF-8">
<meta name="viewport" content="width=device-width, initial-scale=1.0">
<title>Document</title>
</head>
<body>
<h2>
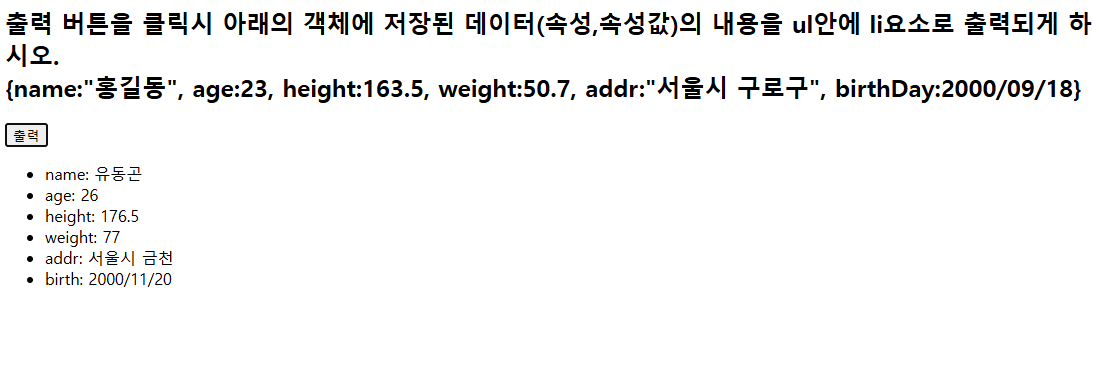
출력 버튼을 클릭시 아래의 객체에 저장된 데이터(속성,속성값)의 내용을 ul안에 li요소로 출력되게 하시오.<br>
{name:"홍길동", age:23, height:163.5, weight:50.7, addr:"서울시 구로구", birthDay:2000/09/18}
</h2>
<div class="list-data">
<button onclick="test();">출력</button>
<ul></ul>
</div>
<script>
function Person(name,age,height,weight,addr,birth){ //생성자
this.name = name;
this.age = age;
this.height = height;
this.weight = weight;
this.addr = addr;
this.birth = birth;
}
function test(){
let a = new Person("유동곤",26,176.5 , 77 , "서울시 금천",'2000/11/20'); //생성자로 객체를 하나만듬
let ul = document.querySelector(".list-data>ul");
//ul의 태그 내에 li태그를 만든 후 각 요소를 집어넣음
ul.innerHTML += `<li>name: ${a.name}</li>
<li>age: ${a.age}</li><li>height: ${a.height}</li><li>weight: ${a.weight}</li>
<li>addr: ${a.addr}</li><li>birth: ${a.birth}</li>`
}
</script>
</body>
</html>
예제5)
<!DOCTYPE html>
<html lang="en">
<head>
    <meta charset="UTF-8">
    <meta name="viewport" content="width=device-width, initial-scale=1.0">
    <title>Document</title>
</head>
<body>
    <h2>
        1. 출력하기 버튼 클릭시 아래의 객체배열로 저장된 데이터를 div#data-table영역안에 table 요소를 만들어서 출력하시오.<br>
        [{no:1,title:"첫번째",writer:"유저1",enrolldate:오늘날짜} <br>
         {no:2,title:"두번째",writer:"유저2",enrolldate:오늘날짜} <br>
         {no:3,title:"세번째",writer:"유저3",enrolldate:오늘날짜} <br>
         {no:4,title:"네번째",writer:"유저4",enrolldate:오늘날짜}] <br>
        * 이때 위의 객체배열을 전역변수로 만들어 둘 것 *
    </h2>
    <button onclick="test1();">출력하기</button>
    <div id="data-table"></div>
<hr>
    <h2>
       2. 아래의 input태그들을 이용해서 사용자로부터 글번호, 제목, 작성자명, 작성일을 입력받고 <br>
          추가 버튼 클릭시 위 10번 문제에서 세팅해둔 전역 객체배열에 추가한 후 table에도 한 행 추가 되는 기능을 구현하시오. <br>
          (테스트시 1번 실행 후 2번 실행하기)
    </h2>

    글번호 : <input type="number" id="boardNo"> <br>
    제목 : <input type="text" id="boardTitle"> <br>
    작성자 : <input type="text" id="boardWriter"> <br>
    작성일 : <input type="date" id="boardDate"> <br>

    <button onclick="test2();">추가</button>


<script src="test5.js"></script>
</body>
</html>
data = [
{no:1,title:"첫번째",writer:"유저1",enrolldate:`2025-03-27`},
{no:2,title:"두번째",writer:"유저2",enrolldate:`2025-03-27`},
{no:3,title:"세번째",writer:"유저3",enrolldate:`2025-03-27`},
{no:4,title:"네번째",writer:"유저4",enrolldate:`2025-03-27`}
]; //전역변수로 설정한 배열
function test1(){
let tab = document.querySelector("#data-table");
a = `<table border=1>`;
for(let i =0 ; i<data.length ; i++){
a+= `<tr>`;
for(j in data[i]){
a+= `<td>${data[i][j]}</td>`; //열에 값 추가
}a+= `</tr>`; //다음행으로 넘기기
}a+=`</table>`;
tab.innerHTML = a;
}
function test2(){
let no = document.querySelector("#boardNo").value;
let ti = document.querySelector("#boardTitle").value;
let wr = document.querySelector("#boardWriter").value;
let da = document.querySelector("#boardDate").value;
data.push({ no: `${no}`, title: `${ti}`, writer: `${wr}`, enrolldate: `${da}` });
//배열.push : 뒤에추가
}
에제6) onkeyup
<!DOCTYPE html>
<html lang="en">
<head>
    <meta charset="UTF-8">
    <meta name="viewport" content="width=device-width, initial-scale=1.0">
    <title>Document</title>
</head>
<body>
    <h2>
        아래의 텍스트 상자에서 사용자가 입력할 때 마다 현재 입력된 글자와 글자수를
         div#text-container에 출력되게끔 구현하시오.
    </h2>
    <input type="text" class="input-data" onkeyup="test12();">
    <div id="text-container"></div>

<script>
    function test12(){
        let con = document.querySelector("#text-container");
        let i = document.querySelector(".input-data").value;
        con.innerHTML =`입력된글자 :${i} 글자수 :${i.length}`
        //keyup : 키보드에서 손을 뗄 때 동작하므로 += 보다는 = 를 해야
        //입력할때마다 글자,글자수가 바뀔것임
    }
</script>
</body>
</html>
예제7) ===을 통해 값비교 진행해보자
<!DOCTYPE html>
<html lang="en">
<head>
    <meta charset="UTF-8">
    <meta name="viewport" content="width=device-width, initial-scale=1.0">
    <title>Document</title>
</head>
<body>
    <h2>
        아래의 텍스트 상자를 이용해서 사용자에게 비밀번호를 두번 입력 받는다. <br>
         이때 비밀번호와 비밀번호 확인 텍스트상자에 사용자가 입력할때 마다 두개의 입력된 비밀번호를 비교해서 <br>
         두개가 일치하면 초록색 문구로 "일치합니다.", 일치하지 않으면 빨강색으로 "일치하지 않습니다." 문구를 <br>
         span#pwd-result에 출력하시오.
    </h2>
    비밀번호 : <input type="password" id="input-pwd" onkeyup="test();"><br>
    비밀번호 확인 : <input type="password" id="input-pwdck" onkeyup="test();"><br>

    <span id="pwd-result"></span>

</body>
</html>
<script>
function test(){
let p = document.querySelector("#input-pwd").value;
let pCk = document.querySelector("#input-pwdck").value;
let result = document.querySelector("#pwd-result");
result.setAttribute("style","color:red")
if(p.length!=0 && pCk.length!=0){ //두개중 하나라도입력을 안헀다면 문구출력안함
if(p===pCk){
result.style.color = "green";
result.innerHTML = `<h3>일치합니다</h3>`;
}
else{
result.innerHTML = `<h3>일치X</h3>`;
}
}
}
</script>'JavaScript' 카테고리의 다른 글
| 부트캠프40일(jQuery 요소관련, 이벤트핸들러) (0) | 2025.03.31 |
|---|---|
| 부트캠프39일(jquery{요소선택자,필터링,요소탐색,예제}) (0) | 2025.03.28 |
| 부트캠프37일차(BOM,game) (0) | 2025.03.26 |
| 부트캠프35일차 (JS(시간함수,Event,배열) (0) | 2025.03.21 |
| 부트캠프34일차(JS[요소조회출력, 문자열,Math, 조건문]) (0) | 2025.03.20 |